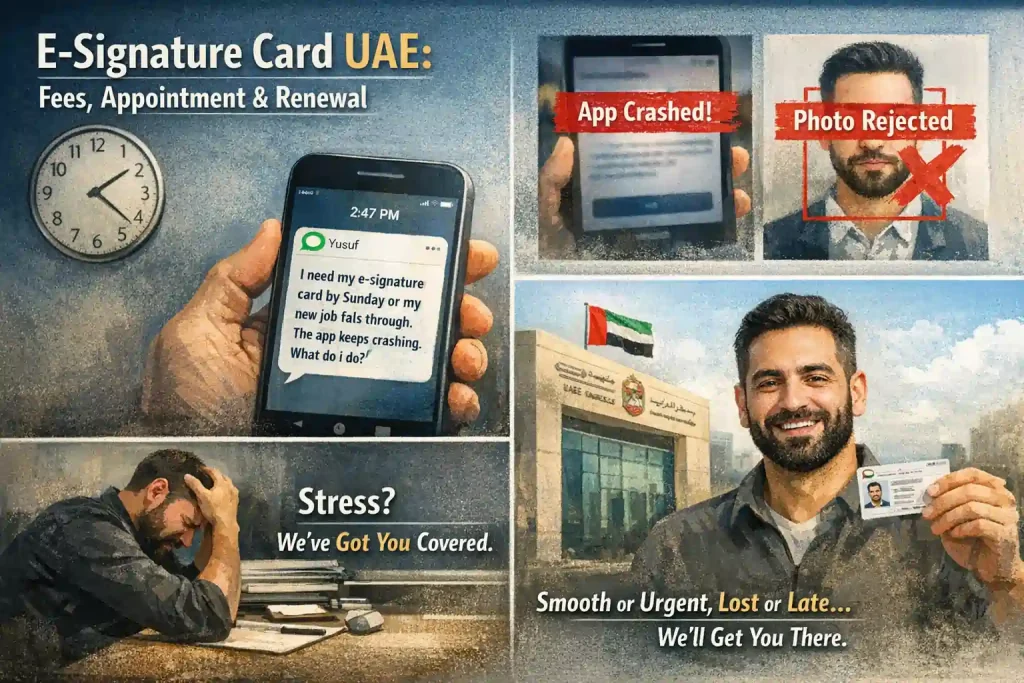
E-Signature Card UAE: Fees, Appointment & Renewal
Thursday afternoon, 2:47 PM. A phone buzzes with a message from a friend named Yusuf:
“I need my e-signature card by Sunday or my new job falls through. The app keeps crashing. What do I do?”
Messages like this come often, not always about a job, sometimes about visa renewal or a contract expiring. Always with the same undertone: panic.
Here’s the thing about the e-signature card process:
It’s simple when you know how, and terrifying when you don’t. Most guides online cover the happy path: apply, wait, receive, done. But what happens when the app crashes? When your photo gets rejected? When the card doesn’t arrive?
That’s where this guide comes in. It covers everything: the smooth path, the frustrating path, the urgent path, and the “I lost it” path
Yusuf got his card four days later, right before the deadline. The secret? He knew where to go when things went wrong.
You will too. Let’s walk through it together.
What Actually Is an E-Signature Card?
Let’s be honest, when most people first hear “e-signature card,” it sounds like some fancy digital thing living inside a phone. Turns out, it’s both simpler and more important than that.
The one-sentence answer
An e-signature card is a smart chip card issued by MOHRE that holds your digital signature and links to your labour contract. Think of it as your official work identity card for the digital world.
What it looks like: The physical version is a plastic card, similar to your Emirates ID, with your name, photo, and a chip inside. The digital version lives inside the MOHRE app on a phone and works the same way.
Most people carry the physical card but use the digital version 90% of the time. The digital one is faster. The physical one is the backup when a phone dies or the app acts up.
What It Actually Does
| Function | Why It Matters |
| Signs labour contracts digitally | No more paper, no more printing |
| Links to your MOHRE file | Everything in one place |
| Verifies your identity | Proves you are who you say you are |
| Grants access to MOHRE services | Complaints, gratuity claims, transfers |
Without it, you can’t sign a new labour contract, switch jobs officially, file a MOHRE complaint, or access your end-of-service benefits online.
The Confusion Most People Have
Some folks think it’s the same as their labour card. It’s not. Your labour card proves you’re employed by a specific company and stays with that employer.
Your e-signature card is your personal digital identity that follows you across jobs. You keep it even when you change companies.
Why It Exists
Back in the day, every contract required physical signatures. Paper. Stamps. Trips to typing centres. Lost documents. Endless waiting.
The e-signature card killed all that. Now you can sign contracts from your phone in two minutes. No paper. No travel. No waiting. It’s one of those things you don’t appreciate until you remember how it used to be.
Who Needs One
Anyone employed in the UAE with a labour contract, including domestic workers, private sector employees, and most freezone employees. Government employees use a different system. Unemployed individuals, children, and visitors don’t need one.
Quick check: Open your MOHRE app. If you see a card with your photo and a chip icon, you have it. If you don’t, keep reading.
Why You Need One (Real Reasons)

Last month, Karim almost lost a job offer. Good role. Better pay. Closer to home. Everything lined up.
Then the new HR asked: “Do you have your e-signature card?”
Karim said, “I think so? Maybe? What is it exactly?”
The answer was no. He didn’t have it. And because he didn’t, he couldn’t sign the new contract.
The company got impatient and moved to the next candidate. All because of a little plastic card he didn’t know mattered. Let’s make sure that doesn’t happen to you.
Reason 1: You Can’t Sign a New Contract Without It
This is the big one. UAE labour law now requires digital contracts. Paper contracts are mostly gone. And digital contracts need digital signatures.
No e-signature card means no signature, which means no job. Simple as that. Whether you’re starting your first job in the UAE, switching companies, or renewing with your current employer, you need this card.
Reason 2: Your Visa Processing Hangs on It
Here’s something most people don’t realize. Your e-signature card is tied to your labour card. Your labour card is tied to your visa status. They all talk to each other.
If your e-signature card expires, some visa services can pause. If you don’t have one at all, certain visa transactions get stuck. A friend tried to renew his family’s visas. Everything approved.
Last step? His e-signature card had expired. Had to renew it first. Delayed everything by two weeks.
Your e-signature card connects to your salary structure. See how CTC affects your employment records.
Reason 3: MOHRE Services Require It
Want to file a complaint against your employer? Check your gratuity balance? Request a labour letter? Transfer sponsorship? You’ll need the card.
The MOHRE app checks for it before letting you access most services. Without it, you’re locked out of your own employment data.
Without it, you can’t access your gratuity, learn how to claim what you’re owed once you have your card
Reason 4: It Stays With You (Even When Jobs Don’t)
This is the part people love. Your labour card belongs to your employer. Change jobs, and that card is gone. Your e-signature card? Yours forever.
Keep it through job changes, company switches, visa renewals, and residence status changes. It’s your constant in a system that changes a lot.
Reason 5: It Saves You Trips to Typing Centres
Remember the old days? Every contract needed a typing centre. Print. Sign. Stamp. Scan. Submit. Pay. Wait.
With the e-signature card, you do it from your couch in pajamas at midnight. Two minutes versus two hours. That’s the difference.
Reason 6: Employers Check for It
More companies now ask about it during hiring. Not having it won’t automatically disqualify you, but having it shows you’re prepared, organized, and familiar with how things work here.
In a competitive job market, small signals matter.
Quick Self-Check
| If You | You Need This Card |
| Have a job in the UAE | Yes |
| Are starting a new job | Yes |
| Plan to switch jobs | Yes |
| Want to use MOHRE services | Yes |
| Are between jobs | Still keep it |
One thing to remember: Karim eventually got his card. Took him a week. The job was gone. He tells everyone now: “Get it before you need it. Not when you need it.” Wise words.
This isn’t one of those things you can rush at the last minute. It takes time. Appointments. Processing days. So if you don’t have it yet, or you’re not sure, the next sections show you exactly how to get it. Before you need it.
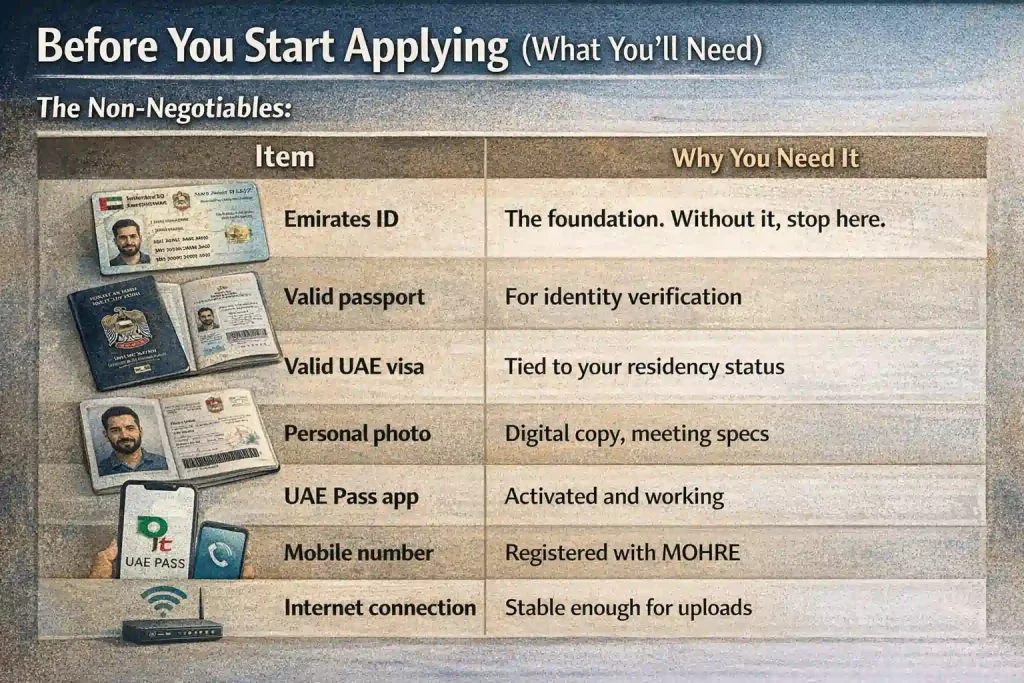
Before You Start Applying (What You’ll Need)
Nothing’s worse than sitting down to apply, all ready to go, and realizing you’re missing something. The form times out. The app logs you out. You have to start over.
Let’s avoid that. Here’s exactly what you need before you begin.
The non-negotiables:
| Item | Why You Need It |
| Emirates ID | The foundation. Without it, stop here. |
| Valid passport | For identity verification |
| Valid UAE visa | Tied to your residency status |
| Personal photo | Digital copy, meeting specs |
| UAE Pass app | Activated and working |
| Mobile number | Registered with MOHRE |
| Internet connection | Stable enough for uploads |
The Emirates ID Rule
This is where most people get stuck. You cannot apply for an e-signature card without a valid Emirates ID.
Not “almost cannot.” Cannot. The system checks. If your ID is expired or still processing, the application won’t go through.
Check yours now. Open your wallet. Look at the expiry date. If it’s less than a month away, renew your ID first.
Lyla once started the application only to get rejected at the last step. Wasted an hour. Learn from me.
Photo Requirements (Get This Right)
The photo is the number one reason applications get rejected.
| Requirement | What It Means |
| White background | Plain white wall, no patterns |
| No shadows | Face evenly lit |
| Both ears visible | Yes, really |
| No glasses | Unless medical necessity |
| No head coverings | Except religious |
| Recent photo | Within last 6 months |
Pro tip: Take your photo against a white wall in natural light. Have someone help you. No selfies. My friend wore a white shirt against a white wall. His head looked like it was floating. Application rejected. Don’t be my friend.
UAE Pass: The gatekeeper: You need an UAE Pass to log into MOHRE services. If you don’t have it, download the UAE Pass app, register with Emirates ID, complete face verification, and set up a PIN or biometric.
If you have it but it’s not working, check if it’s expired (yes, it expires), update the app, or reset via the website if needed. Do this before you start the e-signature application. Not during.
Documents to have ready: Save these as PDFs or clear photos on your phone: Emirates ID (front and back), passport page with photo, current visa page, and personal photo meeting specs.
One folder. Easy to find. Takes two minutes now. Saves twenty minutes of scrambling later.
Mobile number check: Your mobile number must be registered with MOHRE. Log in to the MOHRE app, go to your profile, and see if the number is correct.
If it’s wrong, update it before applying. All SMS updates go here.
Internet connection: Sounds obvious, but hear me out. The MOHRE app and website can be sensitive.
If your connection drops mid-upload, you might have to restart. Use Wi-Fi, not mobile data. Stable connection only.
Quick Checklist:
- Emirates ID valid
- Passport and visa copies ready
- Photo saved (white background, no shadows)
- UAE Pass installed and working
- Mobile number correct in MOHRE
- Good Wi-Fi connection
- 20 minutes of uninterrupted time
One thing to remember: Preparation takes ten minutes. Rushing takes hours. Get everything ready first. Then start. Future you will be grateful.
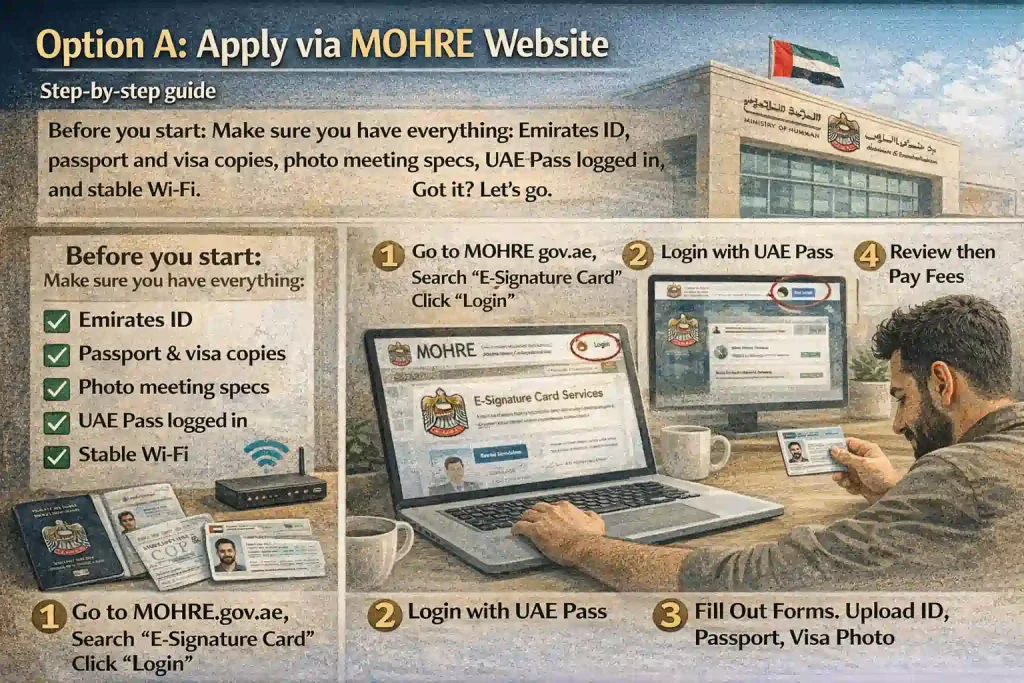
Option A: Apply via MOHRE Website
Some people prefer the website. Bigger screen. Slower pace. Room to breathe. If that’s you, this section is for you. Let’s walk through it step by step, including the parts where people usually get stuck.
Before you start: Make sure you have everything that includes: Emirates ID, passport and visa copies, photo meeting specs, UAE Pass logged in, and stable Wi-Fi. Open a new tab.
Let’s go.
Step 1: Go to MOHRE website
Type this exactly: www.mohre.gov.ae. Don’t Google it and click random ads. Use the official address.
The homepage loads. You’ll see options in Arabic and English. Click English if that’s easier for you.
Step 2: Log in with UAE Pass
Look for the UAE Pass button, usually in the top right corner. Click it. A new window pops up. It asks for your UAE Pass PIN or fingerprint.
Pro tip: If UAE Pass asks for OTP and you’re not getting it, check your spam folder. Happens sometimes. Once logged in, you’re redirected back to MOHRE.
Step 3: Find the e-signature card service
This is where people wander. On the dashboard, look for “Services” then “E-Signature Card.” Or use the search bar. Type “e-signature” and it should pop up. Click it.
Step 4: Start a new application
You’ll see two options: New Card and Renew Card. Choose New Card unless you’re renewing. The system will check your details automatically.
It pulls data from your Emirates ID and UAE Pass. If something looks wrong with spelling, birth date, don’t proceed.
Fix it first through Emirates ID or UAE Pass.
Step 5: Fill in your details
Most fields auto-populate, but check these carefully
| Field | What to Check |
| Full name | Matches passport exactly |
| Date of birth | Double-check |
| Nationality | Correct? |
| Passport number | No typos |
| Passport expiry | Valid for 6+ months? |
| Mobile number | Where SMS will go |
One typo can delay everything. Read each field twice.
Step 6: Upload documents
Now for the part that stresses people out. You’ll need to upload your Emirates ID (front and back), passport copy (photo page), visa page, and personal photo.
| Document | Accepted Format | Max Size |
| Emirates ID | JPG, PNG, PDF | 2 MB |
| Passport | JPG, PNG, PDF | 2 MB |
| Visa | JPG, PNG, PDF | 2 MB |
| Photo | JPG, PNG | 1 MB |
The photo must have a white background, no shadows, both ears visible, and be recent.
Ahmed uploaded a photo with a shadow on his neck. Rejected the next day. Cost him three days.
Pro tip: Take photos with your phone, then use a free online tool to reduce file size if needed.
Step 7: Review everything
Before paying, review. Every. Single. Detail. Scroll through slowly. Compare with your documents. This is your last chance to catch mistakes before they cost you time.
Step 8: Pay the fee
The current fee is around 300 AED for a new card. Payment methods include credit/debit card and Apple Pay. Once payment goes through, you’ll see a confirmation screen.
Save this screen. Screenshot it. Write down the reference number. It looks like MOHRE-2026-XXXXXX.
You’ll need it to track your application, book your biometric appointment, and follow up if something goes wrong.
Step 9: Book a biometric appointment
After payment, the system prompts you to book a biometric. You’ll see a calendar with available dates and centres.
Choose the nearest Tas’heel or MOHRE centre and the earliest available date. Popular centres book fast. If you see no dates, check tomorrow morning again.
New slots open regularly.
Step 10: Confirmation
You’ll get a screen confirmation with appointment details, an SMS to your mobile, and an email if you provided one.
Save the appointment details. Add to your phone calendar. Set a reminder.
What If You Get Stuck?
| Problem | Fix |
| Website crashes | Wait 5 minutes, try again |
| Payment fails | Check the card balance, try a different card |
| No appointment slots | Check daily, new slots appear |
| Upload fails | Reduce file size, try JPG instead of PDF |
| UAE Pass not working | Reset the UAE Pass first |
How Long This Takes
Filling in details takes 5–7 minutes. Uploading docs takes 5–10 minutes. Payment takes 2 minutes. Booking an appointment takes 3 minutes. The total is about 15–20 minutes.
Not bad for something that protects your entire work life.
One thing to remember: The website version gives you more control. You can see everything clearly, review slowly, and double-check details.
If you’re the type who likes reading every field before clicking, this is your path. Just don’t rush. Twenty minutes now saves weeks of headaches later.
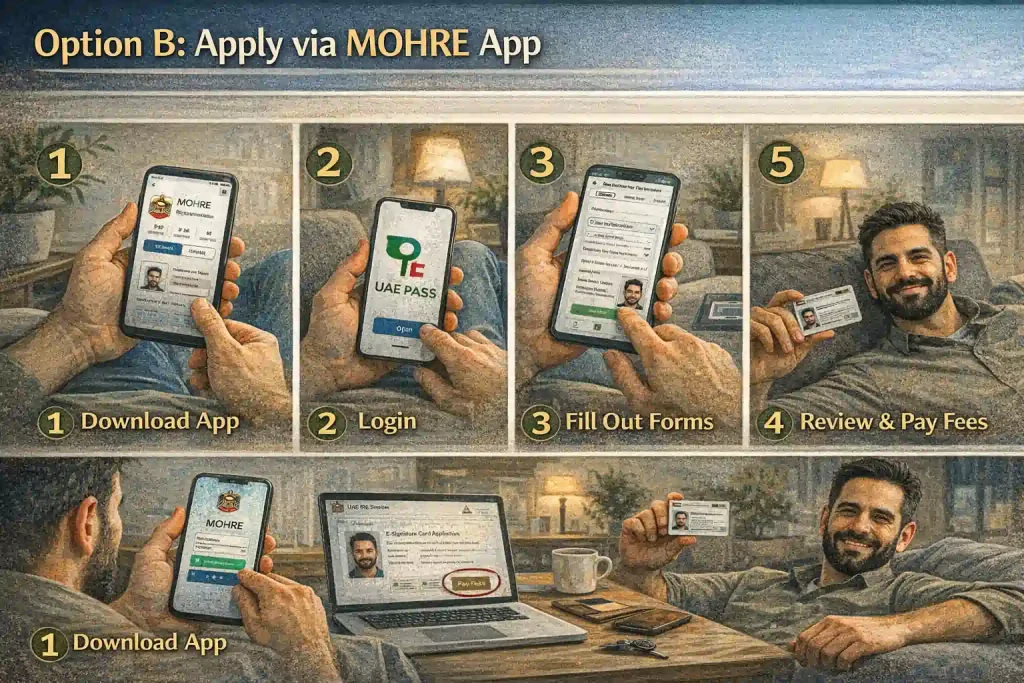
Option B: Apply via MOHRE App
The app is faster. Most people prefer it. You can do it from anywhere, your couch, your lunch break, or late at night when you finally have a quiet moment.
But here’s the thing about the app: it’s simple when it works and frustrating when it doesn’t. Let’s walk through it so you hit smooth road, not potholes.
Before You Open The App
Quick check: UAE Pass installed and working, Emirates ID valid, documents saved on your phone, good internet (Wi-Fi recommended), and phone charged.
Nothing worse than dying mid-upload.
Step 1: Download or open the MOHRE app
On iPhone, go to App Store. On Android, go to Google Play or Huawei AppGallery. Search for “MOHRE UAE.”
Look for the official one icon is dark blue with white text. Already have it? Make sure it’s updated. Old versions act weird sometimes.
Step 2: Log in with UAE Pass
Open the app. You’ll see two options: Login with UAE Pass and Guest.
Don’t choose a guest; you need to log in. Tap UAE Pass. The app switches to UAE Pass. You’ll use either your 6-digit PIN, Face ID, or fingerprint.
Pro tip: If UAE Pass asks for OTP and you’re not getting it, wait 2 minutes. Sometimes networks lag. Don’t keep requesting, it blocks you.
Step 3: Find the service
Once logged in, you land on the dashboard.
Look for “Services” then “E-Signature Card.” Or scroll down, there’s usually a quick access tile.
Can’t find it? Use the search icon at the top. Type “signature,” and it should appear.
Step 4: Choose a new application
You’ll see Apply for New Card, Renew Card, and Replace Lost Card. Tap Apply for New Card. The app pulls your details from UAE Pass automatically. Name, ID, nationality, all there.
Step 5: Verify your details
This is where people get lazy. Don’t. Check every field against your passport: full name (exact spelling), date of birth, nationality, passport number (no typos), and mobile number (where SMS goes).
Ahmed skipped this. His name was missing a letter. The card arrived wrong. Had to reapply. Slow down. Read twice.
Step 6: Upload documents
This is where the app shines and where it gets tricky. You’ll upload your Emirates ID (front and back), passport copy, visa page, and personal photo.
The app lets you take photos directly, which works well most times.
| Document | How to Do It |
| Emirates ID | Lay flat on a dark surface. Good lighting. |
| Passport | Open to the photo page. No fingers. |
| Visa | Find the clearest page. |
| Photo | Have someone take it. No selfies. |
Photo rules (don’t ignore these): white background (plain wall), face centered, both ears visible, no shadows, no glasses, recent photo (last 6 months).
Lyla used a photo with a shadow. Rejected in 24 hours. Cost him three days.
Step 7: The upload glitch (and how to fix it)
Sometimes the app says “Upload Failed.” Don’t panic.
Try checking file size (too big equals fail), taking a new photo (not from the gallery), restarting the app, switching from mobile data to Wi-Fi, or trying again.
If it keeps failing, switch to the website. Same process, fewer glitches.
Step 8: Review and pay
After uploads, you see a summary screen. Read everything again. The fee is around 300 AED. Payment options include Apple Pay, credit/debit card, and some local cards.
Tap Pay. Wait for confirmation.
Step 9: Save reference number
After payment, a screen appears with your reference number (MOHRE-2026-XXXXXX), next steps, and a button to book a biometric.
Screenshot this screen now. You’ll need that number to track your application, book your appointment, and follow up.
Step 10: Book a biometric appointment
Tap Book Appointment. You’ll see available centres near you, available dates, and time slots. Tips: Morning slots fill fast. Check Thursdays, some centres open.
If no slots, check again tomorrow. Choose your centre. Pick a time. Confirm.
Step 11: Confirmation
You’ll get in-app confirmation, SMS to your mobile, and an option to add to your calendar. Add it to your calendar now. Set two reminders: one day before and one hour before.
App vs Website: Which Is Better?
| Factor | App | Website |
| Speed | Faster | Slower |
| Photo upload | Camera direct | Need files ready |
| Review | Easy to miss details | Easier to check |
| Glitches | Sometimes buggy | More stable |
| Where to use | Anywhere | Computer only |
Our advice: Use the app if you’re comfortable with phones. Use the website if you want to be extra careful.
Common App Problems and Fixes
| Problem | Fix |
| App crashes on open | Update or reinstall |
| Upload keeps failing | Reduce file size, use Wi-Fi |
| Payment not going through | Check card, try Apple Pay |
| No appointment slots | Check early morning |
| UAE Pass not working | Reset the UAE Pass first |
| App in Arabic only | Settings → Change language |
How Long This Takes
Login and form take 3–5 minutes. Uploads take 5–7 minutes. Payment takes 2 minutes.
Booking takes 2 minutes. The total is about 12–15 minutes. Faster than the website. Usually.
One thing to remember: The app is convenient. But don’t rush just because it’s fast. Every mistake you make now becomes a delay later.
Take the extra minute to check your details. It’s the difference between “done” and “do it again.”
The Biometric Appointment (What to Expect)
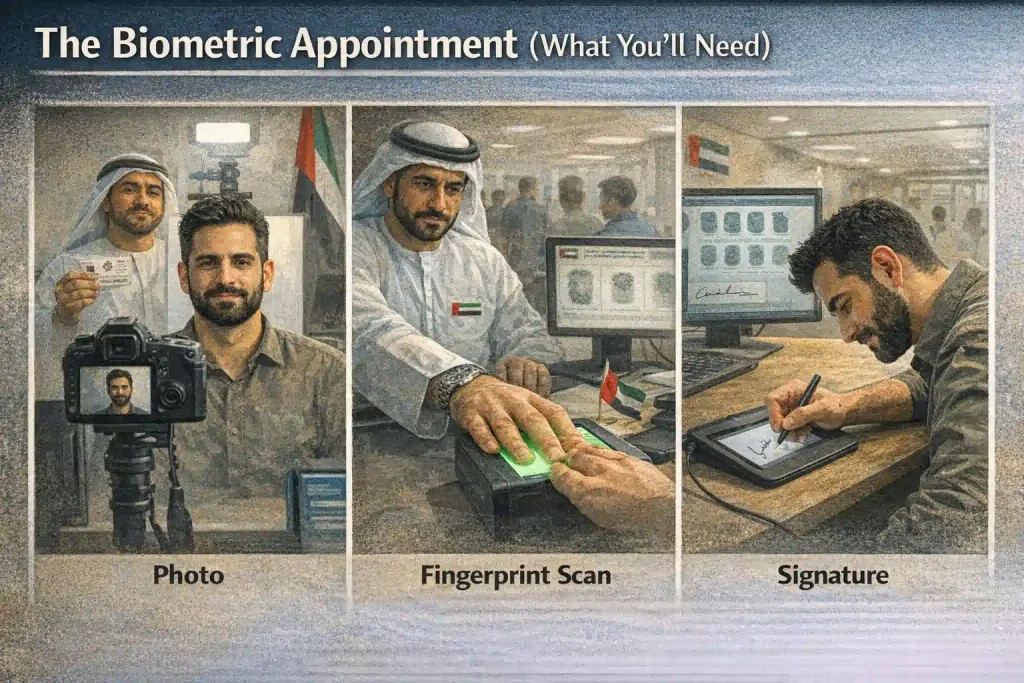
Let’s be honest, biometric appointments feel awkward. You walk in. Someone calls your name. You stand in front of a camera. They take your picture. Scan your fingerprints. Capture your signature. And you wonder if your hair looks okay.
Everyone feels this way. You’re not alone. Here’s exactly what happens, so there are no surprises.
Where To Go
You don’t have a choice in the centre; the system assigns available ones near you.
Common locations include Tas’heel centres, MOHRE service centres, some Amer centres, and selected typing centres.
Your appointment confirmation SMS will tell you exactly the centre name, address, building name if needed, and floor and counter number.
Pro tip: Save the location in Google Maps right away. Some centres are hidden in areas you don’t expect.
What To Bring:
| Item | Why You Need It |
| Original Emirates ID | Primary ID |
| Passport | Backup ID |
| Appointment SMS | Shows you’re expected |
| Reference number | If they ask |
| Water | You might wait |
One more thing: Charge your phone. You might need to show the SMS or MOHRE app.
What To Wear
This matters more than you think.
| Do | Don’t |
| Dark colours | White (washes out) |
| Solid colours | Busy patterns |
| Collared shirt | Hoodies |
| Normal hair | Hats or caps |
| Natural face | Heavy makeup |
Lyla wore a white kandura. The photo washed out completely. They made her retake it, wearing a black jacket they had lying around.
She still gets embarrassed talking about it. Religious head coverings are fine, just don’t cover your face. Remove glasses unless medically necessary.
What Time To Arrive
Arrive 10–15 minutes early. Not too early. Not late. If you’re late, they might reschedule you, and appointment slots aren’t always available the next day.
Traffic warning: Check Google Maps before leaving. Some centres are in busy areas. Add buffer time.
What Happens Inside
Step 1: Check-in
Go to the reception desk. Show your appointment SMS and Emirates ID. They’ll check you in and tell you which counter to go to, whether to wait, and the estimated time.
Step 2: Waiting
Bring your phone. Scroll. Reply to messages. But keep your ears open, they call names, not numbers.
| Time of Day | Wait Time |
| Morning (8–10 am) | 5–15 minutes |
| Midday (10 am–1 pm) | 15–30 minutes |
| Afternoon (1–3 pm) | 10–20 minutes |
| Evening (4–6 pm) | 20–40 minutes |
Step 3: Your turn
An officer calls your name. Walk to the counter. They’ll ask for your Emirates ID and sometimes your passport.
The Biometric Process
Photo: Stand on the marked spot. Look at the camera. No smile, official photo face. They’ll take 1–2 shots. Don’t stress if the first one isn’t perfect. They usually check and retake if needed.
Fingerprints: Left hand first. Then right. Place your hand flat on the scanner, all fingers, not just thumbs. They might roll each finger. Some officers are gentle. Some press hard. Either way, it takes 30 seconds.
Signature: They’ll hand you a small device or paper. Sign normally within the box. Same as your passport signature. Done.
How Long Does It Take
| Step | Time |
| Check-in | 2 minutes |
| Waiting | 5–40 minutes |
| Biometric | 5–7 minutes |
| Total | 15–50 minutes |
Fastest I’ve seen: 12 minutes total.
Slowest: 1 hour 20 minutes (busy day, system down).
Average: 25–30 minutes.
After The Appointment
You’re done. Go home. Your part is finished. Now MOHRE does theirs. You’ll get an SMS confirming biometric completion, another SMS when the card is processed, and courier tracking if delivery is included.
What to do now: Nothing. Wait. The system works.
Common Awkward Moments and How to Handle Them
| Situation | How to Handle |
| “They said my photo is too dark.” | They’ll retake it. No big deal. Adjust your position. |
| “My fingerprints weren’t clear.” | Happens. Dry hands? They’ll try again or use different fingers. |
| “They asked for a document I don’t have.” | Politely explain. Show what you have. Most officers help if you’re respectful. |
| “The system crashed while I was there.” | Annoying, but not your fault. Wait if you can. Reschedule only if you must. |
If You Miss Your Appointment
Life happens. Sick. Emergency. Traffic disaster. Log in to the MOHRE app, go to your applications, find the appointment, and reschedule if slots are available.
If no slots, call MOHRE at 800-60. Explain politely. They sometimes open a slot for genuine cases.
One thing to remember: The biometric appointment is the most awkward part of the whole process. But it’s also the shortest.
Twenty minutes of mild discomfort, and then it’s done. Your card gets processed. You move on. Everyone who works in the UAE has done this. You’ll get through it, too.
How Long It Takes (Realistic Timeline)
Everyone asks the same question after applying:
“When will I get it?”
The answer is always the same:
“It depends.”
Not very helpful, right? Let’s get specific.
Here’s what actually happens and how long each piece usually takes.
The Ideal Timeline
| Step | Time |
| Online application | 15–20 minutes |
| Biometric appointment | 1–7 days (depending on slots) |
| Card processing | 3–5 working days |
| Delivery | 2–3 days |
| Total | 1–2 weeks |
This is the happy path. It happens for most people.
Calculate your future gratuity while you wait.
What Each Step Actually Looks?
Application to biometrics: The system shows you available appointment slots. Some centres have next-day openings. Others are booked a week out.
Pro tip: If you see no slots, check early morning around 8 AM. New slots drop then.
Processing time: Once you complete the biometric, your application goes into processing.
MOHRE aims for 3–5 working days, not calendar days. Weekends pause the clock. Friday and Saturday don’t count.
| Day You Do Biometric | Processing Starts | Likely Ready By |
| Sunday | Sunday | Thursday or Sunday |
| Tuesday | Tuesday | Sunday or Monday |
| Thursday | Thursday | Wednesday or Thursday |
Delivery time: Once processed, the card is handed to the courier.
Couriers take 2–3 days to deliver. Sometimes faster in Dubai. Sometimes slower in remote areas. You’ll get an SMS with tracking once it’s shipped.
The Realistic Timeline
| Delay | New Timeline |
| Appointment slots full | Add 3–5 days |
| Photo rejected (fix and resubmit) | Add 2–4 days |
| Payment failure | Add 1–2 days |
| Public holiday week | Add 3–5 days |
| Courier busy (peak times) | Add 2–3 days |
Realistic total: 2–3 weeks.
Why does it sometimes take longer?
| Reason | What Happens |
| Application errors | Photo wrong, document unclear |
| High demand | More applicants mean slower processing |
| System issues | Rare, but happens |
| Incorrect details | Name mismatch = manual review |
| Biometric centre delays | Some centres are slower than others |
My colleague’s card took 4 weeks. His photo was rejected twice. First time because of a shadow. Second time because the file was too small. Third time worked.
How to Check Your Status
Via MOHRE app: Log in, go to “My Applications,” find your e-signature card application, and see current status.
Via website: Same process. Log in. Check the dashboard.
Via SMS: You’ll get updates at key milestones: application submitted, biometric completed, card processed, and card shipped. Save these messages until your card arrives.
What the status messages mean:
| Status | What It Means |
| Pending Payment | Payment not completed |
| Under Review | MOHRE checking documents |
| Awaiting Biometric | Appointment booked but not done |
| Biometric Completed | You did your part |
| Processing | Card being made |
| Shipped | With courier |
| Delivered | Check your mailroom |
When to worry (and when not to):
| Timeline | Feeling | Action |
| Week 1 | Normal | Nothing |
| Week 2 | Impatient | Check status |
| Week 3 | Annoyed | Call MOHRE |
| Week 4+ | Concerned | Escalate |
Call MOHRE at 800-60 if there’s no update for 2+ weeks after biometric, status is stuck on the same step for 10+ days, or the card is marked delivered but not received.
Factors That Speed Up Things
Apply early in the week (Sunday or Monday), choose the earliest biometric slot, upload a perfect photo the first time, double-check all details, and use the MOHRE app for faster processing.
Factors That Slow Things Down
Applying on Thursday afternoon (weekend pause), choosing far-future appointments, uploading blurry documents, using photos with shadows, and making typos in your name or passport number.
One thing to remember: Two weeks feels long when you’re waiting. But compare it to the old days, paper forms, typing centres, multiple trips.
This is lightning fast by comparison. The system works. Just give it time. And if it takes longer than expected, you know exactly what to do and who to call.
If You Need It Urgently
Sometimes waiting two weeks isn’t an option.
Maybe you have a job offer expiring. Maybe your visa renewal is days away. Maybe your employer is asking for it by Friday.
Whatever the reason, you need this card fast. Here’s how to make that happen.
First, know what “urgent” means: MOHRE doesn’t treat all urgency the same.
| Situation | They Care? |
| “I have a job offer expiring Sunday.” | Yes |
| “My visa expires in 3 days.” | Yes |
| “I just want it faster.” | No |
| “My friend got his in 3 days” | Not relevant |
Real urgency equals proof. Job offer letter. Visa expiry date. Contract deadline.
Step 1: Book the earliest appointment
Don’t just pick any slot. Hunt for the earliest. Check at 8 AM when new slots are released. Check multiple centres to widen your search. Check Thursdays when some have extra slots. Refresh throughout the day because cancellations happen.
My friend found a next-day slot at 9 PM. Someone cancelled. He grabbed it.
Step 2: Visit a centre directly
Some centres accept walk-ins for urgent cases. Not all, but some. Try major Tas’heel centres, MOHRE head offices, and busy locations.
What to say: “I have an urgent situation. My job offer expires on [date]. Is there any way to get a biometric done today?”
Be polite. Show proof if you have it. Staff sometimes help if they can.
Step 3: Call MOHRE
The hotline exists for a reason: 800-60. Call and explain your situation clearly. Before calling, prepare your application reference number, Emirates ID number, proof of urgency (job offer or visa document), and the specific date you need it by.
What to say: “I applied for my e-signature card on [date]. My reference number is [number]. I have a job offer expiring on [date]. Is there any way to expedite processing or get an earlier biometric slot?”
Step 4: Explain at the biometric centre
Even after booking, you can ask. When you go for biometrics, bring your proof. Show the officer and say:
“I know processing takes time. But if there’s any way to flag my file as urgent, I’d really appreciate it. Here’s my job offer letter.”
Sometimes they note it in the system. Sometimes it helps. Sometimes it doesn’t. But asking costs nothing.
Step 5: Follow up daily (nicely)
Once biometrics is done, don’t just wait. Check status daily in the app. If it’s stuck on “Processing” for 5+ days, call again. Say:
“My biometric was done on [date]. I just wanted to check if there’s any update. Still hoping to get it by [date] if possible.”
Politeness matters. The person on the other end didn’t cause your delay. They’re more likely to help if you’re kind.
Real Story
How Ahmed got his card in 4 days. Ahmed had a job offer starting Monday. He applied on Tuesday.
No biometric slots for 10 days.
He went to Tas’heel directly, explained his situation, and showed his offer letter. They found a cancellation and did his biometric that afternoon. He called MOHRE on Wednesday and explained again.
They noted urgency. His card was processed on Friday and delivered Saturday morning. He started on Monday on time.
What If Nothing Works?
Sometimes you do everything right and still face delays. If you’re past your deadline and still waiting, get confirmation from your employer that they’ll wait, ask for a digital copy if available, or request a letter from MOHRE confirming processing.
Most employers understand. They know the system. They’ve been through it themselves.
One thing to remember: Urgent doesn’t mean instant. Even with expediting, you’re looking at biometric in 1–2 days if lucky, processing in 2–3 days if flagged, and delivery in 1–2 days if the courier cooperates. Best case: 4–5 days total. Still faster than normal.
What not to do: Don’t lie about urgency; they check.
Don’t yell at staff; it helps no one.
Don’t pay “agents” promising fast-track; they’re scams.
Don’t give up, keep trying.
Quick Checklist for Urgent Cases
- Gather proof (job offer, visa expiry)
- Check for early appointments (8 AM, multiple centres)
- Try walk-in at busy centre
- Call MOHRE (800-60)
- Ask nicely at the biometric
- Follow up daily (politely)
- Inform the employer of the timeline
If Your Application Gets Rejected
That notification nobody wants. You open the app or check your email, and there it is: “Your application has been rejected.” Your heart sinks. You think, “What did I do wrong? Now I have to start over? This will take forever.
” Take a breath. It’s not as bad as it feels.
First, don’t panic. Rejection doesn’t mean you’re banned from getting the card. It means something was wrong with your application.
Fix it. Reapply. Move forward. Most rejections are fixed in 24–48 hours.
Why Applications Get Rejected
| Reason | How Often |
| The photo doesn’t meet specs | Very common |
| Documents unclear | Common |
| Emirates ID expired | Common |
| Information mismatch | Sometimes |
| UAE Pass issue | Rare |
| Duplicate application | Rare |
Reason 1
Photo problems. This is the number one reason by far.
| Issue | Why It’s Rejected |
| Shadow on the face | The system detects uneven lighting |
| Wrong background | Not plain white |
| Glasses glare | Reflection hides eyes |
| Head covering | Not allowed (except religious) |
| Too dark | Face not clearly visible |
| Too small | File size below minimum |
| Selfie angle | Face not centered |
How to fix it
Stand against a plain white wall. Use natural light; noon works best. Have someone else take the photo. Make sure both ears are visible.
Don’t smile, it’s an official photo. Save as JPG, around 500KB to 1MB.
My cousin’s photo was rejected because of a tiny shadow near his ear. He retook it in direct sunlight. Approved the next day.
Reason 2: Document Issues
For Emirates ID, problems include blurry images, only one side uploaded, or an expired ID. For a passport, issues include an unclear photo page, an expired passport, or the wrong page uploaded.
For a visa, problems include an old visa page, blurry or cut-off images, or an expired visa.
How to fix
Lay documents on a dark surface. Use good lighting with no shadows. Hold the camera steady. Check expiry dates before uploading. Upload both sides where required.
Reason 3: Information Mismatch
The system checks what you enter against official records.
| Field | What Goes Wrong |
| Name | Spelling differs from the passport |
| Date of birth | Wrong day or month |
| Passport number | Typo |
| Nationality | Wrong selection |
How to fix
Compare your application with your passport line by line. My friend typed his passport number wrong by one digit. Rejected. Fixed it. Approved in 2 days.
Reason 4: Emirates ID Expired
This one’s simple. If your Emirates ID has expired, nothing works. Check your ID now. Look at the expiry date. If it’s expired or expiring soon, renew your ID first. Then apply for your e-signature card.
Reason 5: UAE Pass Issues
Sometimes UAE Pass itself is the problem. It might have expired, face verification might be incomplete, or your mobile number might have changed.
Fix
Open the UAE Pass app. Check your status. Complete any pending steps.
What to Do After Rejection
Step 1: Read the rejection reason. The app or email usually tells you why. Look for phrases like “photo does not meet requirements,” “document unclear,” or “information mismatch.”
Step 2: Fix the issue. Address exactly what they mentioned. Nothing else. If your photo was rejected, take a new one. Don’t reuse the same photo. If a document was unclear, retake it with better lighting.
Step 3: Reapply. Log back into the MOHRE app or website. Find your old application. There’s usually an option to “Apply Again” or “Fix and Resubmit.” You don’t start from zero. Your reference number stays the same.
Step 4: Pay again? Sometimes yes. Sometimes no. If the rejection was your fault, a wrong photo, or a bad document, you usually pay again. If the rejection was a system error, which is rare, they might waive the fee.
Step 5: Book a new biometric? If you already done biometrics, you don’t repeat it. If rejection happened before the biometric, you’ll need to book a new appointment.
How Long Does Reapplication Takes
| Step | Time |
| Fixing issue | 10–30 minutes |
| Reapplying | 10–15 minutes |
| Processing | 1–3 days |
| New biometric (if needed) | 1–7 days |
| Total | 2–10 days |
Faster than the first time, usually. Most issues are quick fixes.
Real Stories
Fatima’s photo was rejected twice. First time for a shadow. Second time for the wrong background. The third time was perfect. She got her card 3 days later.
Omar had a passport number typo. Fixed it in 5 minutes. Approved the next day.
Layla’s Emirates ID had expired without her realizing. She renewed her ID, which took 5 days, then reapplied. Her card arrived 2 weeks later than planned, but she got there.
What If You Don’t Know Why?
Sometimes the rejection reason is vague, like “documents do not meet requirements.”
Not helpful, right? Check all your documents again. Retake photos even if they look fine. Call MOHRE at 800-60 and ask for the specific reason.
Say, “My application was rejected, and the reason wasn’t clear. Can you tell me exactly what needs fixing?”
One thing to remember: Rejection is frustrating, but it’s not failure. It’s just the system saying, “Fix this one thing, and you’re good.”
Fix it. Reapply. Move on. Thousands of people get rejected every month. Then they fix it and get their cards. You will too.
If Your Card Doesn’t Arrive
You did everything right. Applied. Paid. Did biometric. Waited. The app says “Delivered.” But your hands are empty. That moment of panic? Totally understandable. Let’s track it down.
Check Everywhere
Before calling anyone, do a quick search.
Check with building security; they often accept deliveries. Check the reception desk, the staff signs for packages. Ask neighbours, wrong door deliveries happen.
Check the mailroom; it might be buried under other packages. Check your desk at work if you gave the office address.
My neighbour’s card was sitting with security for two weeks. He never asked.
Check the Tracking
Your delivery SMS includes a tracking number. Find the SMS from the courier, which is usually Aramex or Emirates Post. Click the tracking link. See the exact delivery status.
If tracking says “Delivered,” check who signed for it and ask that person directly. If tracking says “Out for delivery” for 3+ days, the courier may have lost it. Contact them immediately.
Call the Courier
Get the courier number from your SMS. Say, “My tracking number is [number].
It says delivered but I haven’t received it. Can you check who signed and where?” They can see the name of the person who signed, the exact time, and the delivery location.
If The Courier Can’t Help
Sometimes, couriers have no answer.
Next step: Call MOHRE at 800-60. Say, “My e-signature card was marked delivered on [date], but I never received it. My tracking number is [number]. I’ve checked with security and neighbours.
Can you help?”
They may open an investigation, request the courier to trace it, or initiate a replacement.
Request a Replacement
If the card is truly lost, you’ll need a new one.
Log in to the MOHRE app, go to “E-Signature Card,” and select “Replace Lost Card.” Pay the replacement fee, which is around 300 AED. No new biometric is usually required. Wait 3–5 working days.
While waiting. Your digital card in the MOHRE app still works. For most services, that’s enough. Show it on your phone if needed.
Real Story
Omar’s card was marked delivered, but never came. He checked with security, nothing. Called the courier, they said “signed by reception,” but his building has no reception.
He called MOHRE. They investigated. It turned out the courier delivered to the wrong building. It took 10 days, but they sent a replacement free of charge.
One thing to remember: Lost cards happen. Delivery mistakes happen. Annoying? Yes. Permanent? No. You’ll get it sorted. It might just take a few extra days.
If You Lose Your Card
That sinking feeling when you pat your pocket, and it’s not there. Wallet? Checked. Car? Checked. Home? Checked twice. Gone.
First thing: Don’t panic. It happens more than you think.
Step 1: Look everywhere (really). Before reporting it lost, do a proper search. Check all pockets, including jackets. Check your car seats and glovebox. Check your office desk. Check between sofa cushions.
Think about the last place you remember using it. I once found mine in a book I was reading. No idea how it got there.
Step 2: Report lost in the MOHRE app. If it’s truly gone, open the MOHRE app, go to “E-Signature Card,” and select “Report Lost Card.” Confirm.
This deactivates the old card immediately. Why this matters: Someone else can’t use it.
Step 3: Apply for replacement. After reporting it lost, the same screen shows “Apply for Replacement.” Click and confirm your details. Pay the replacement fee, which is around 300 AED. No new biometric is usually required. Wait 3–5 working days.
Step 4: Use the digital version while waiting. Your digital card in the MOHRE app still works. For almost everything, that’s enough. Show it on your phone if needed.
What If You Find It After Reporting It Lost?
The card is deactivated. You can’t use it even if you find it. But keep it as a souvenir or cut it up.
Real Story
Layla lost her card the day before a job interview. She panicked, reported it lost, and applied for a replacement.
At the interview, they asked for her e-signature card. She showed the digital version on her phone. They accepted it. She got the job. Her new card arrived 4 days later.
One thing to remember: Losing the card is annoying, but it’s not the end of the world. The digital version saves you. The replacement comes fast. You’ll be fine.
Renewal (Don’t Wait Until Last Minute)
Most people forget their card expires. Then one day you open the app and see: “Your card has expired.” And you need it tomorrow. Let’s avoid that.
When to Renew
E-signature cards are valid for about 3 years. Start renewal 30 days before expiry, that’s ideal. Two weeks before is cutting it close.
One week before is risky. After expiry is still possible but annoying.
How to Renew
Log in to the MOHRE app. Go to “E-Signature Card.” Select “Renew Card.” Verify that your details are still correct.
Pay the renewal fee, which is around 300 AED. Wait 3–5 working days. No new biometric is usually needed.
What If It Already Expired?
You can still renew. But some MOHRE services may be blocked until you do. The process is the same. Just select “Renew” and follow the steps.
Fees:
| Type | Fee |
| Renewal (on time) | Around 300 AED |
| Renewal (expired) | Same fee |
| Replacement | Around 300 AED |
Real Story
Karim’s card expired during the Eid holidays. He couldn’t sign his new contract for 10 days. His employer got impatient. He learned the hard way: Renew early.
One thing to remember: Set a calendar reminder 30 days before expiry. Do it now. Future you will be grateful.
Section 14: Questions Everyone Asks (FAQ)
How much does the e-signature card cost?
Around 300 AED for a new card. Same for renewal.
How long is it valid?
About 3 years from the issue date.
Can I use it for other government services?
Mostly MOHRE-related. Some integrations with other departments exist.
Do I need a new one if I change jobs?
No. It stays with you forever.
Can I apply without an Emirates ID?
No. Emirates ID is mandatory.
Is the digital version enough?
Yes. For most MOHRE services, the app version works fine.
What if I lose it before the biometric?
Restart the application. No fee refund.
Can my company apply for me?
Yes. But you still need to do biometrics yourself.
How do I check my card status?
Use the MOHRE app, go to “My Applications,” and use your reference number.
What if my name is spelled wrong?
Contact MOHRE to correct it. You may need supporting documents.
Can I get a refund if rejected?
No. But you can reapply after fixing the issues.
Do children need e-signature cards?
No. Only employed adults.
What if my phone number changes?
Update it in the MOHRE app immediately. All SMS go there.
Can I use it outside the UAE?
No. Only for UAE labour services.
Conclusion
Remember Yusuf from the beginning? The friend who needed his card by Sunday or his job would disappear?
He got it. Four days later. Right before the deadline. Not because he was lucky. Because he knew where to go when the app failed. Who to call when things get stuck. What to fix when his first attempt got rejected.
That’s what this guide is really about. Not just the happy path where everything works perfectly. But the messy middle is where life happens.
Where apps crash. Where photos get rejected. Where cards go missing. Because that’s where most people panic. And that’s where having the right information changes everything.
You now have that information. You know what the e-signature card actually is and why it matters. You have step-by-step walks through both the website and app. You know what to wear to biometric (definitely not white).
You know how long things actually take, not just what the government promises. And most importantly, you know exactly what to do when something goes wrong, whether it’s a rejection, a delay, a lost card, or a delivery that never arrives.
So here’s your move. Open the MOHRE app right now. Check if you have the card. Check when it expires. If you don’t have it, start gathering your documents. If it’s expiring soon, start the renewal process. Two minutes today saves two weeks of panic later.The system works. Thousands of people get their cards every day. You will too. And now, when someone messages you at 2:47 PM in a panic because their app crashed and their job starts Sunday, you’ll know exactly what to tell them.


